One strategy to improve the performance of your Google ads campaign is to create a Negative Keywords List. It simplifies the process of applying common negative keywords to several campaigns. You can quickly compile a list of campaign-specific keywords and assign them with a single click.
To build a negative keywords list, you can check the search term report. This report will help to figure out the words for which you do not wish your ads to be triggered.
Here is an interesting read on Changes to Search Terms Report introduced by Google Ads and Reaction to this Change
With shared negative keyword lists you have the flexibility to allocate the list to either a single campaign or multiple campaigns. Furthermore, you can categorize these keywords based on themes relevant to your services and products. It’s worth noting that while Google Ads imposes a limit of 5000 keywords per list and 20 lists per account, these numbers are generally ample. Additionally, you can periodically include new negative keywords within a list to maintain its manageability and retain full control over it.
How to Create Negative Keyword List
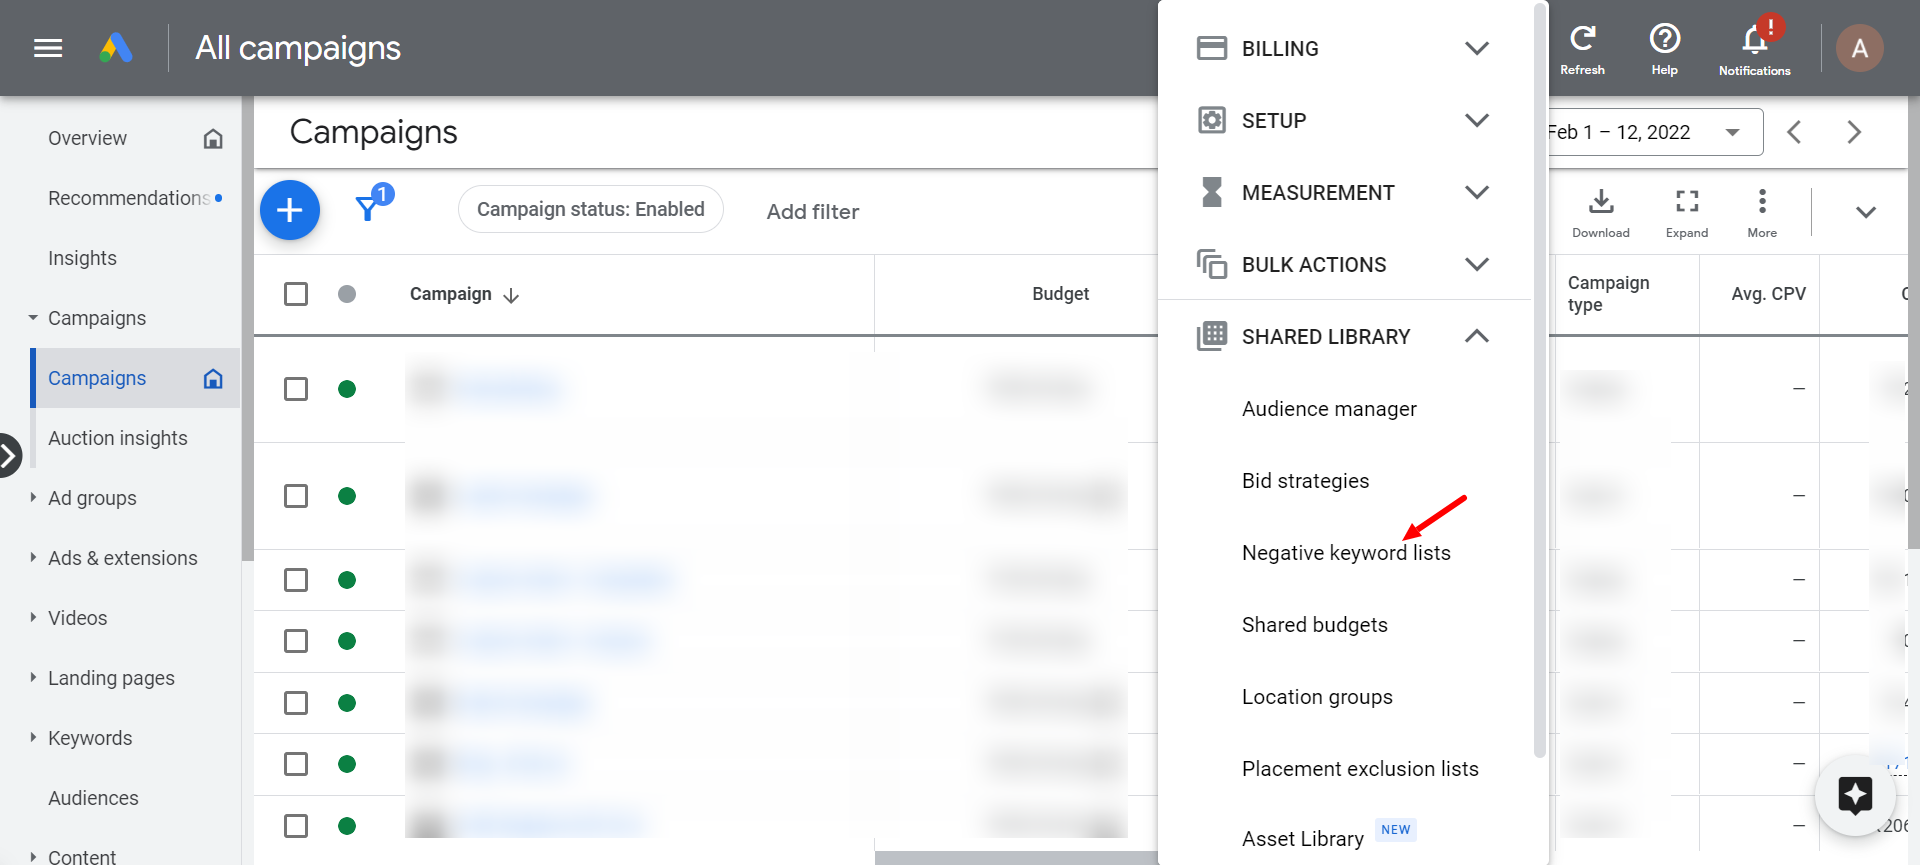
Step 1:
Log in to your Google ads account. Go to Tools & Settings. Under Shared Library, Click on the Negative Keyword List.
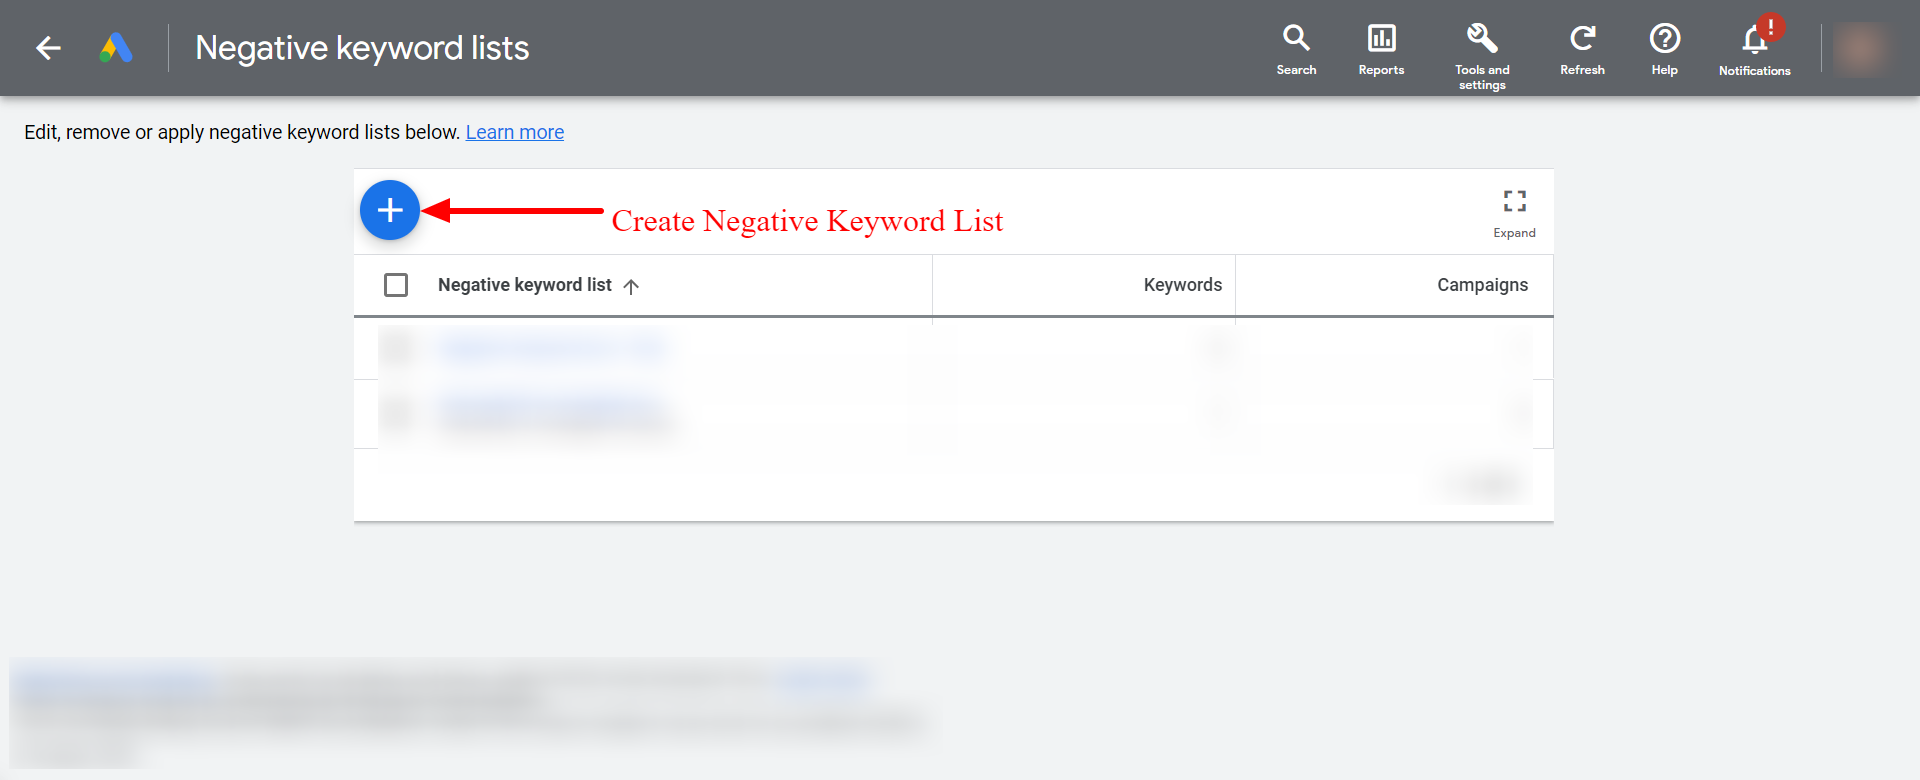
Step 2:
Click on the ‘+’ sign to create a new negative keyword list
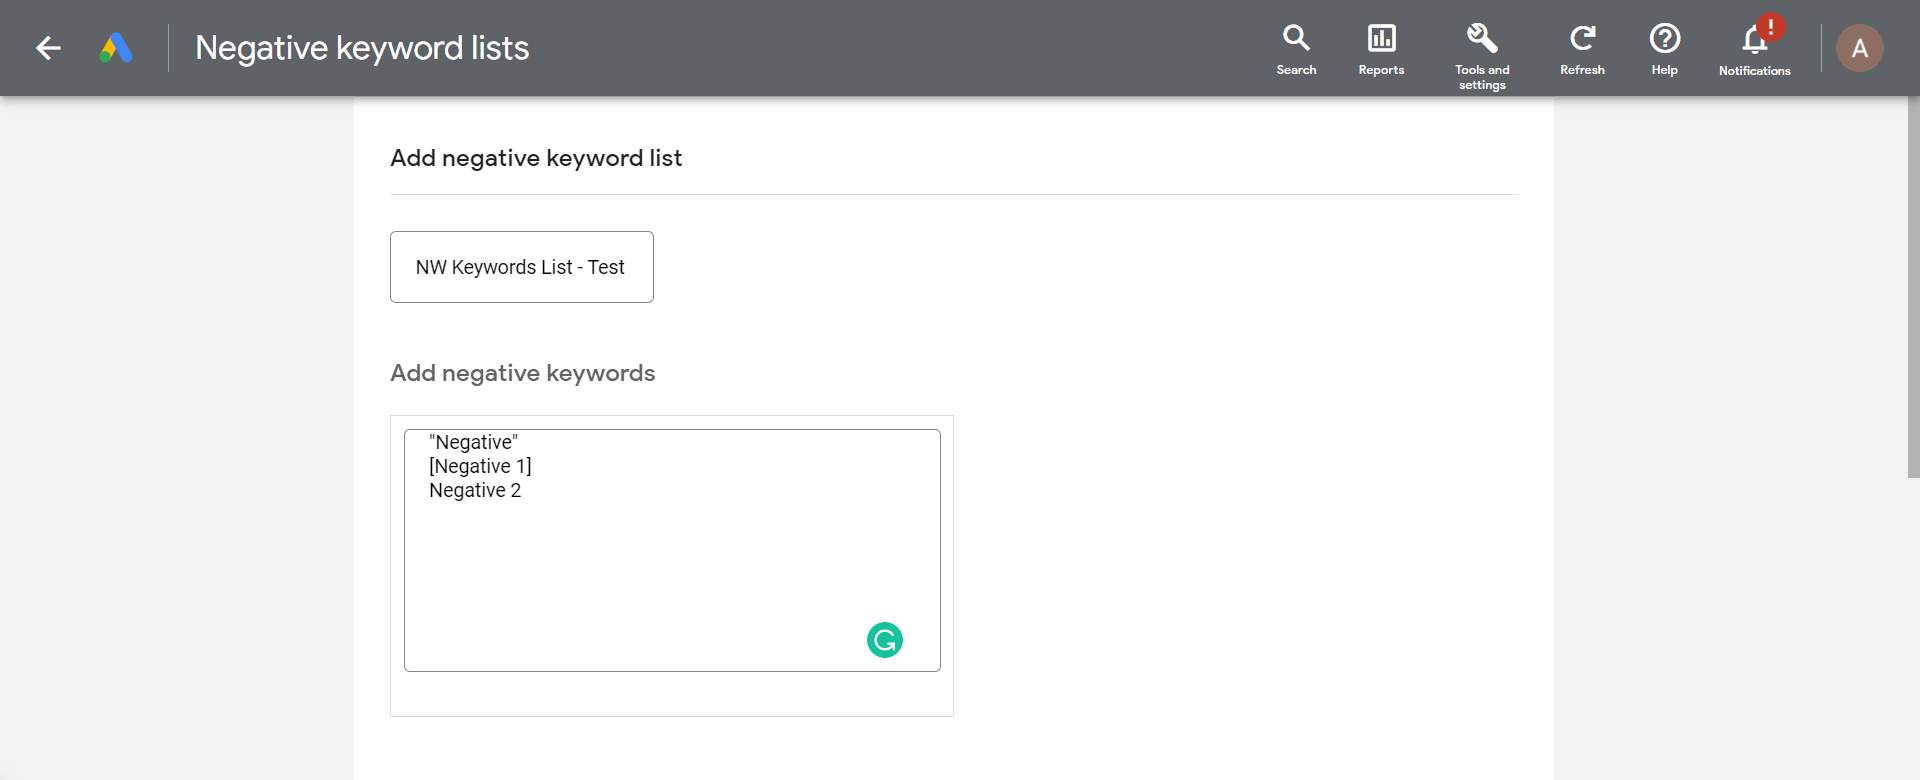
Step 3:
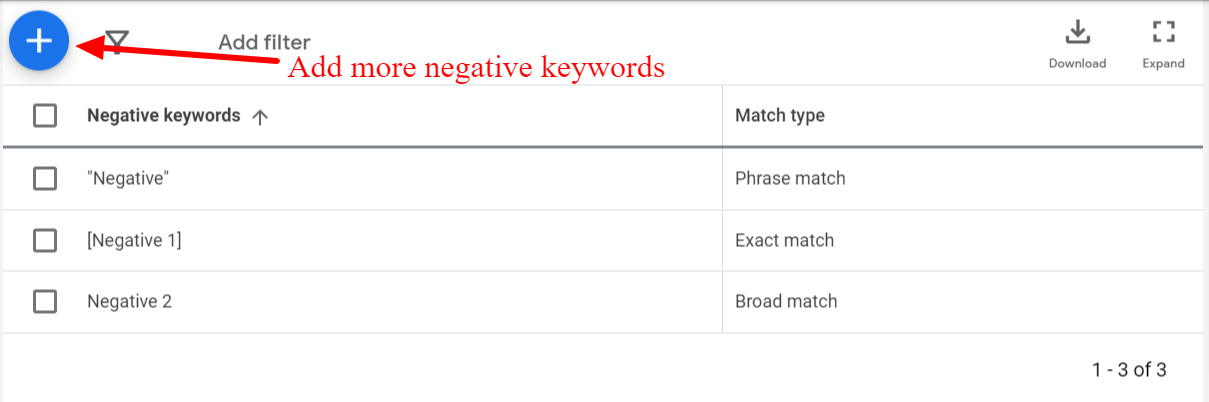
Save the list by adding the details of the negative keyword list in the available fields. You can assign match types to the keywords like this: “Negative” (phrase), [Negative 1] (exact) & Negative 2 (broad).
Step 4:
You can see the saved negative keyword list.
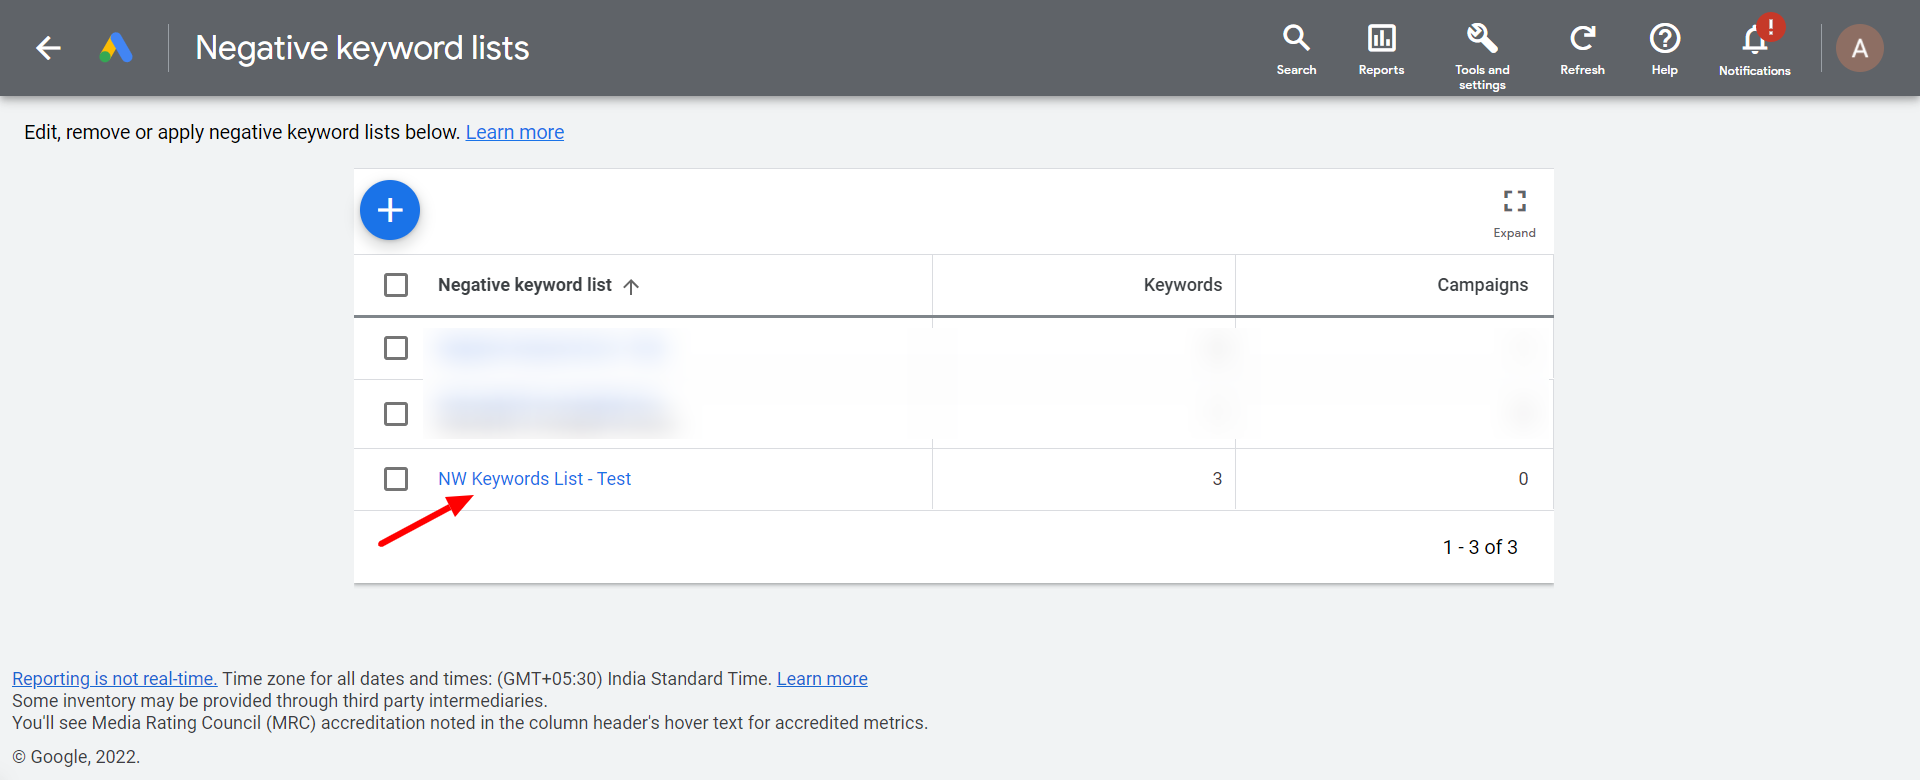
The next step is to allocate this list to the campaigns that you want to run.
How to Apply a Shared Negative Keyword List to Campaigns
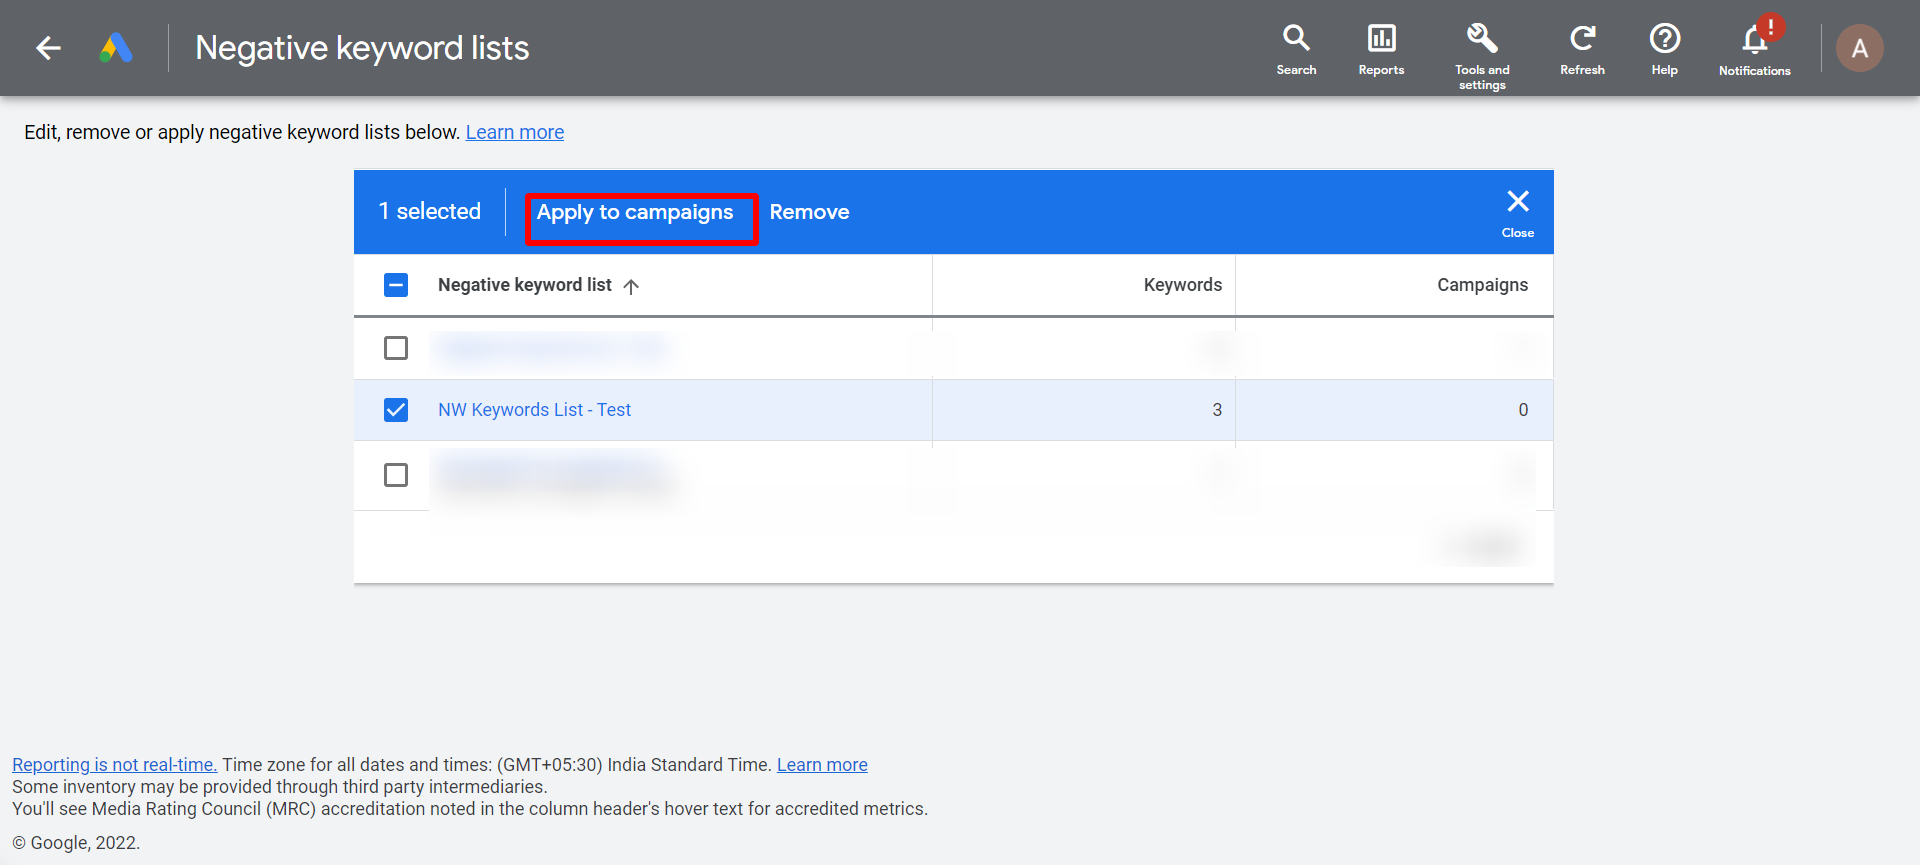
To assign the list to multiple campaigns, select the Negative keyword list and click on “Apply to Campaigns“
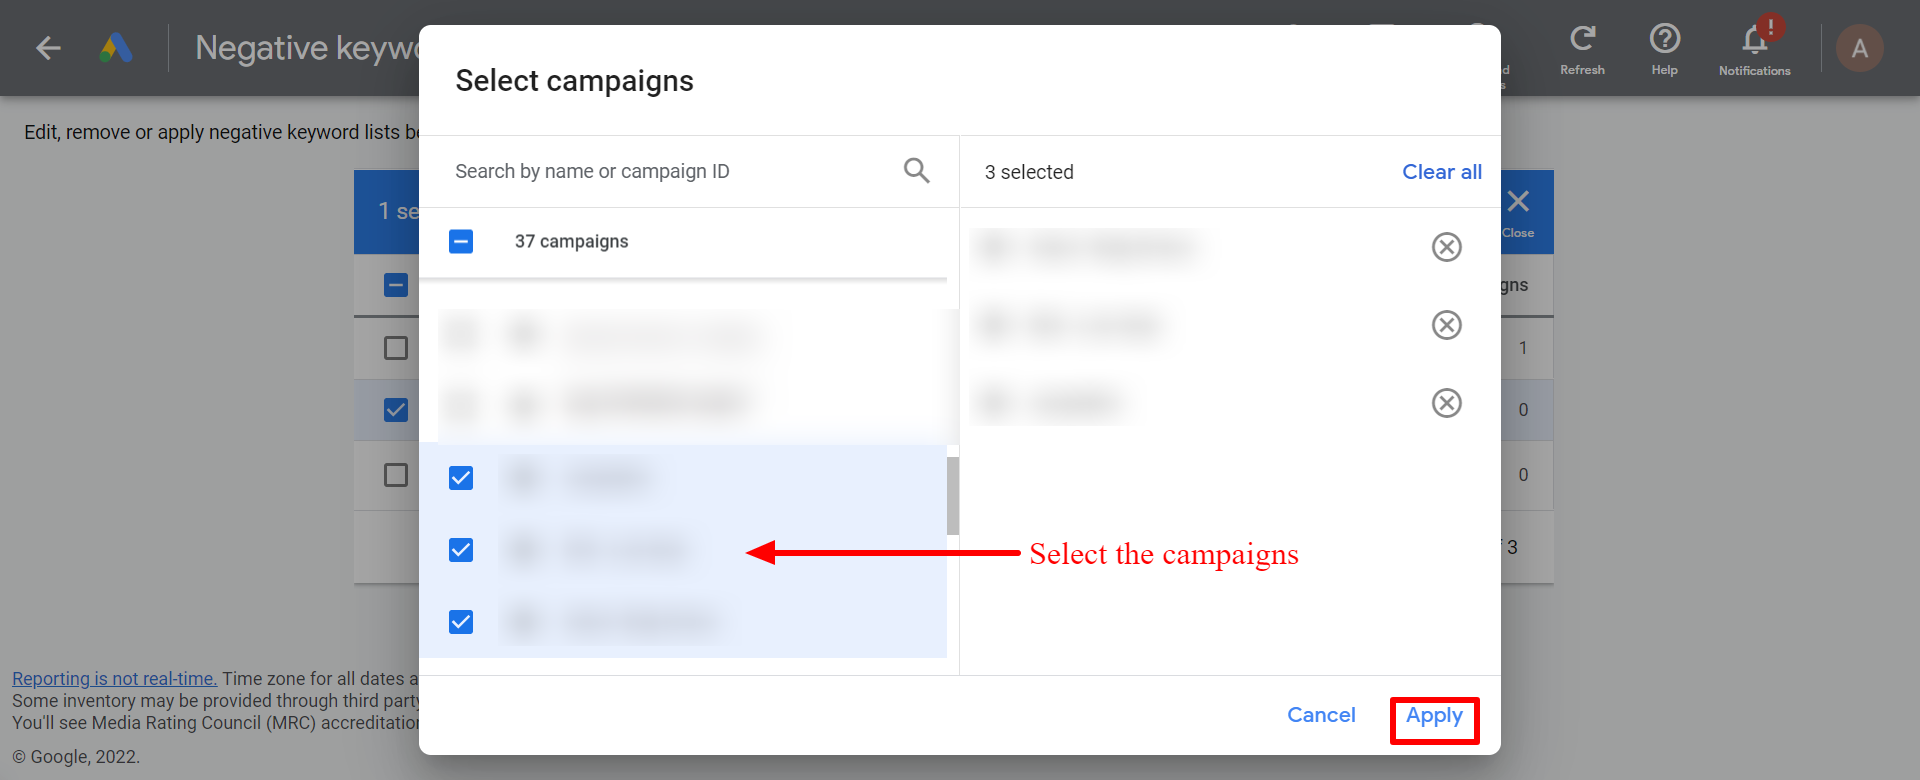
Select the campaigns and click on Apply to assign the negative keyword list.
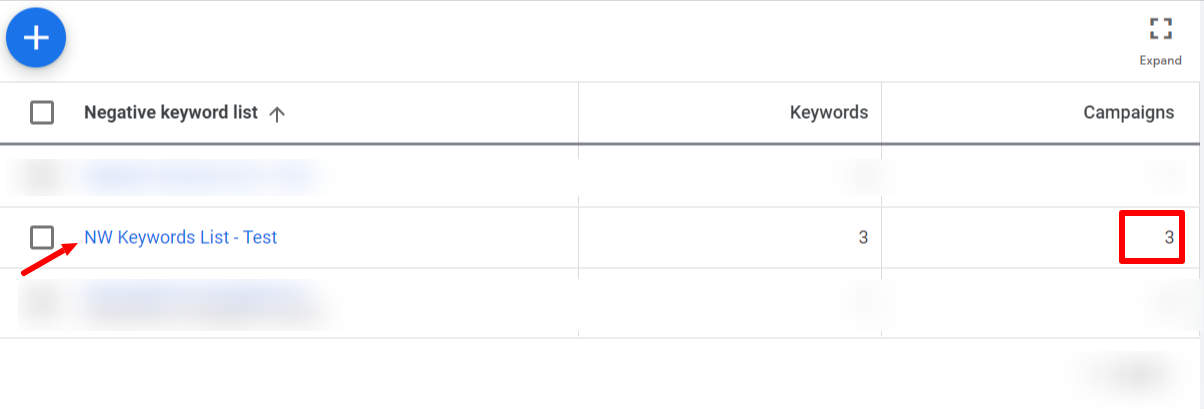
You can see the successfully deployed Negative Keyword List to the chosen campaigns.
If you wish to add more negative keywords to the list, select the created list, click on the “+” sign, add more keywords as per your requirements and save it. These new keywords will automatically get applied to the associated campaigns.
Now that you’ve finished creating your Negative Keyword List, here’s a quick post on what Negative Keywords Lists you can create.
Karooya’s Negative Keywords Tool is now Free for accounts with ad spend less than $10,000 per month. Save 10-20% of your search ad spend for free. Sign up and start saving your ad budget now.
Related Links


Stop the wasted ad spend. Get more conversions from the same ad budget.
Our customers save over $16 Million per year on Google and Amazon Ads.